Windows operating system will allow you for multitasking work. If you want to do a lot of work at once, then a split monitor will give you a lot of benefits. By reading this article you will know how to do split screen windows 10.
Do Split Screen Windows 10 Without Keyboard Shortcut
In this method, you can split your screen into 4 parts. And also can run and monitor 4 applications at once in 1 monitor.
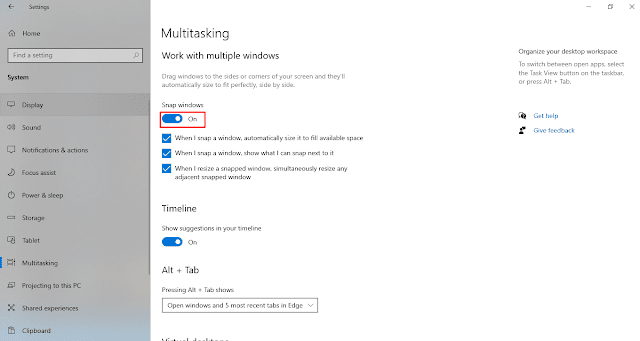
First, you have to enable the snap window. For finding the snap window just follow the path.
start bar > settings > system > multitasking
Once you go to this path you will see a section name snap window. Just enable it.
Then open the application which you want to split. Then just drag one of the applications into any corner of your screen and release. After that this application will take up one-fourth of your screen space. Follow above GIF.
Do the same process for your other running application.
Do Split Screen Windows 10 With Keyboard Shortcut
In this method, you will able to split your screen into two parts. Which is more visible than the 4 split part.
Just select the application and press windows + right arrow ( ⊞ + → ) together. Boom, you will see that your screen is split into 2 parts. Again go to another application and press windows + left arrow. Now you can able to see 2 applications on one monitor.
Note: Press Alt+Tab for switching between application
Conclusion
Now a days everyone wants to work fast. So, splitting the screen will help us for increasing our production rate. Comment and share this article, if you get helped by this article.


0 Comments